
Shingle roof repair / project photos
Repairing the decking around roof pipes
See exposed decking damage around roof pipes, the opened repair area, replacement wood, underlayment, and restored shingles in this project photo sequence.
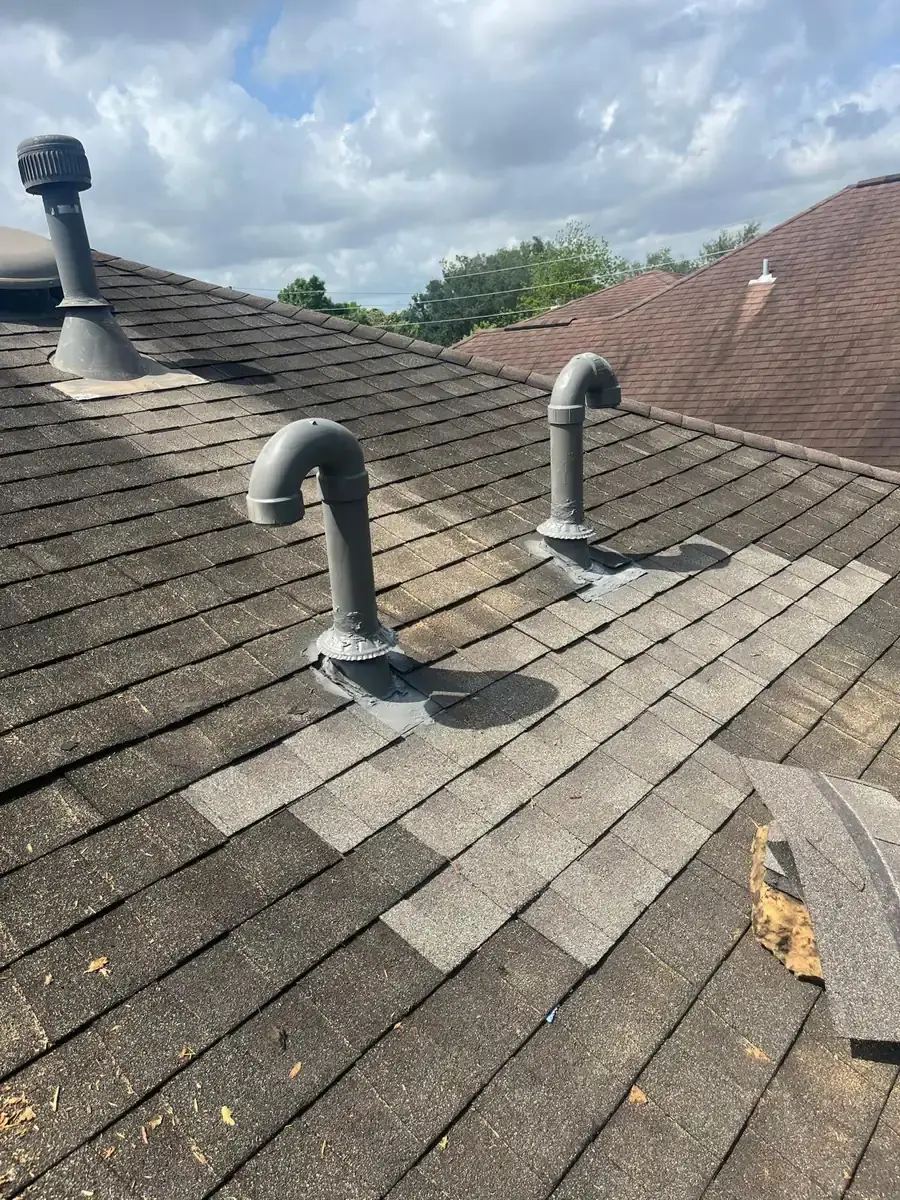
What the photos show
A closer look at the work.
The first image shows an opening in the wood below a pipe flashing. Subsequent photos reveal the area opened for access, replacement panels, underlayment, and the surrounding shingle surface restored. The sequence explains why a roof repair assessment may need to look beneath a flashing instead of considering only its exposed surface.
The work in detail
Follow the visible stages.
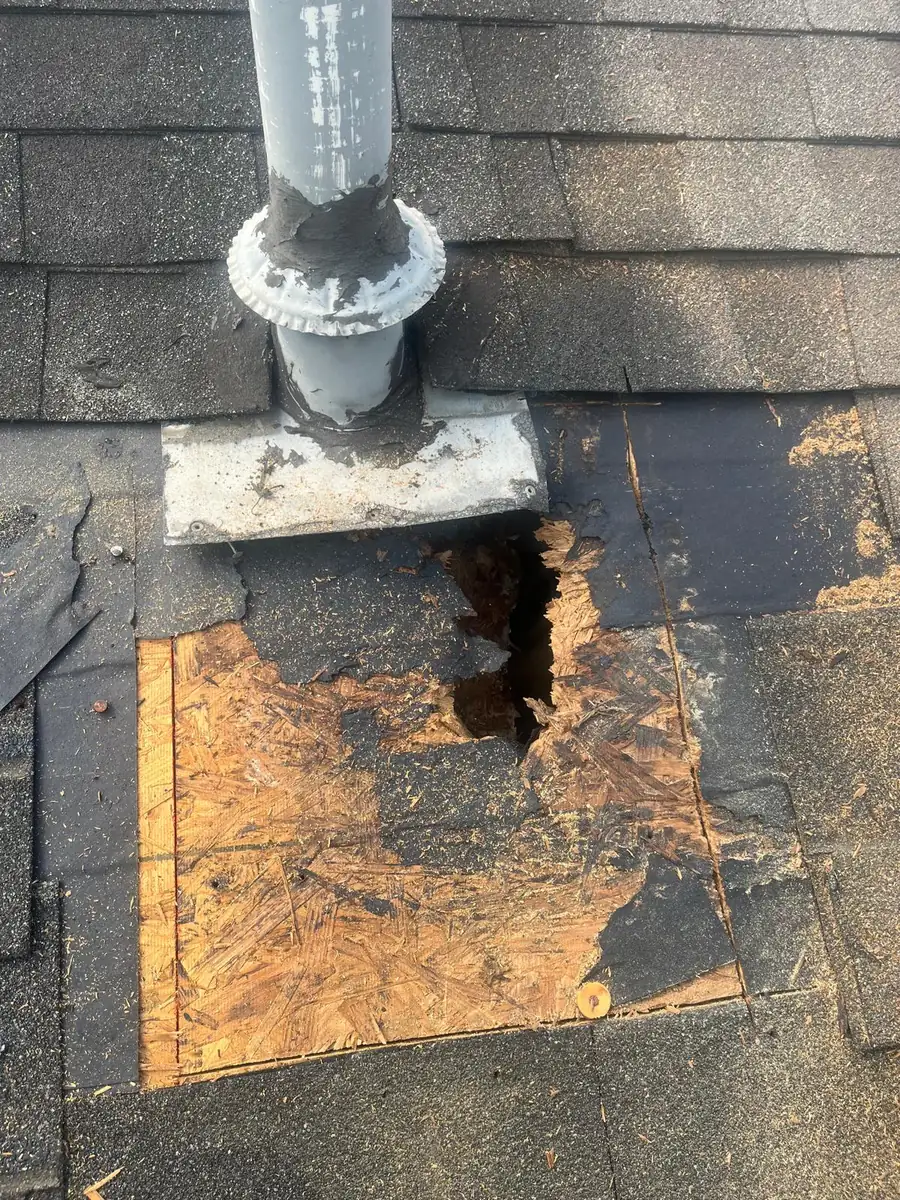
Removing shingles exposes a hole and deteriorated decking below the pipe flashing. The surrounding roof surface alone does not show the full extent of the opening.
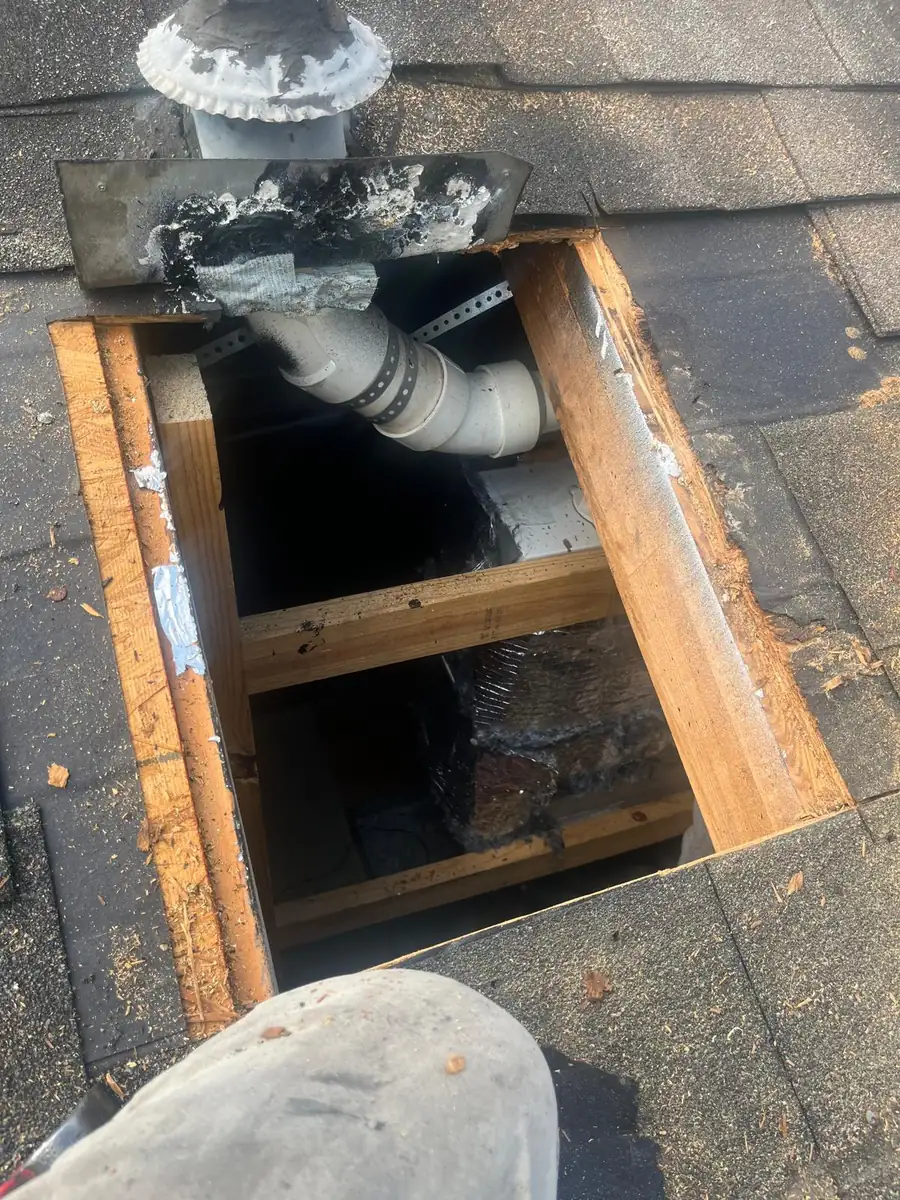
The affected section is open, with the framing and pipework visible below the roof surface.
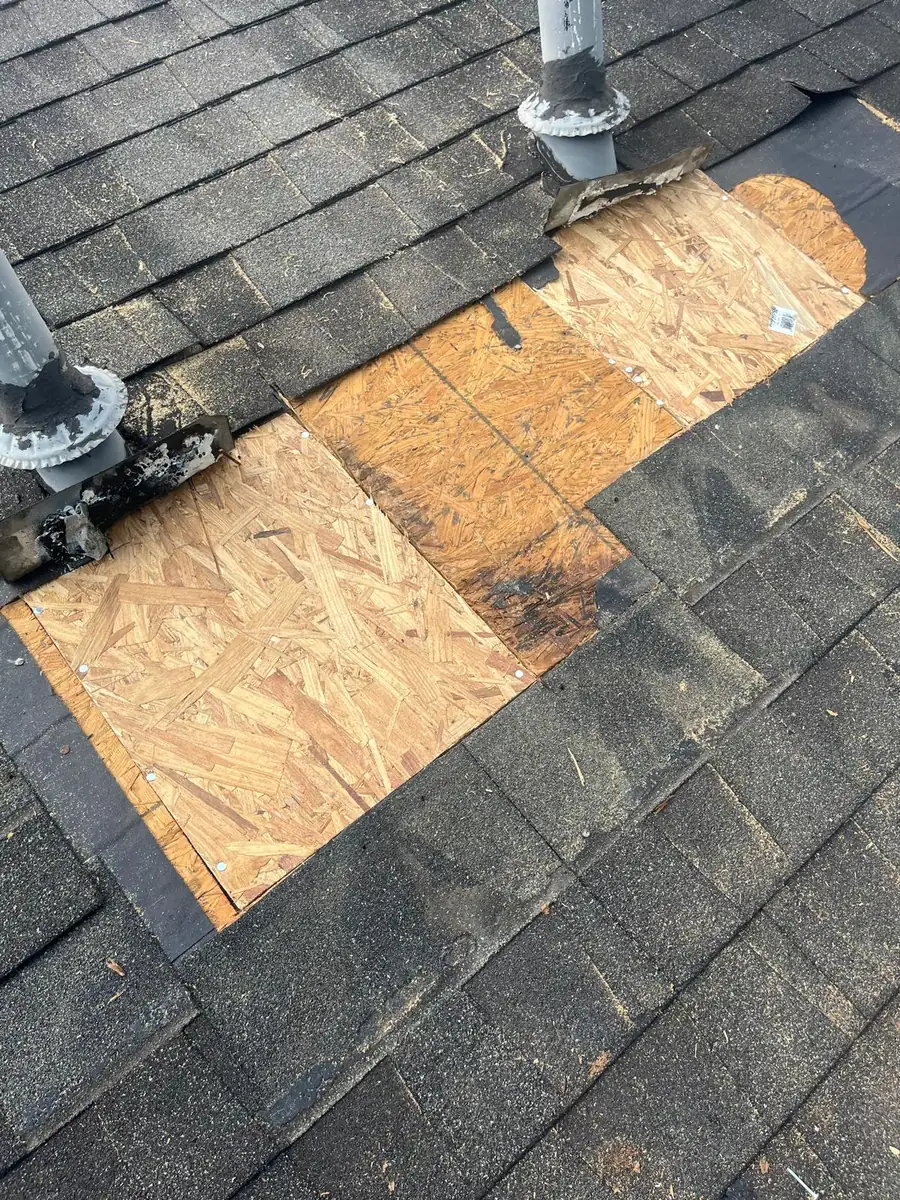
Replacement wood panels fill the opened sections around the pipe penetrations.
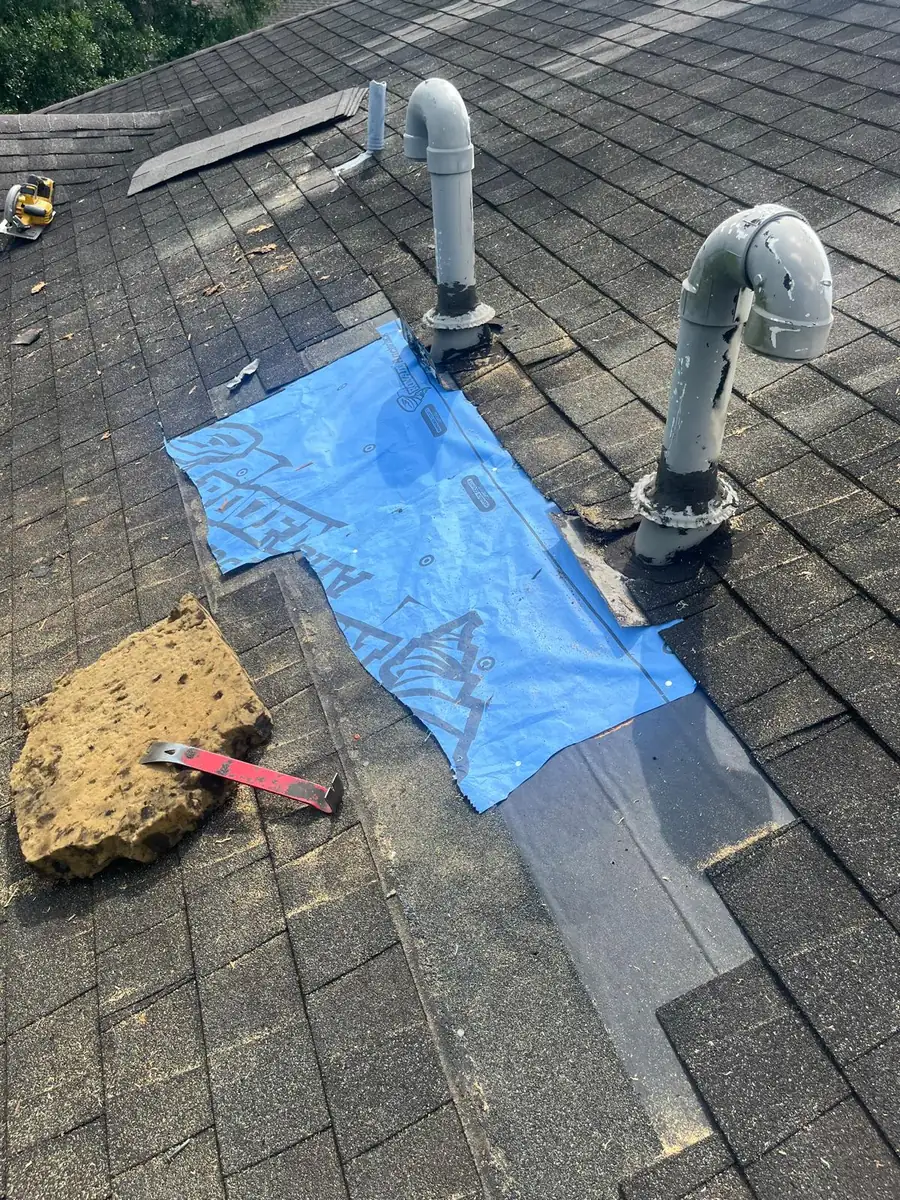
Underlayment covers the repaired decking before the shingle surface is restored.
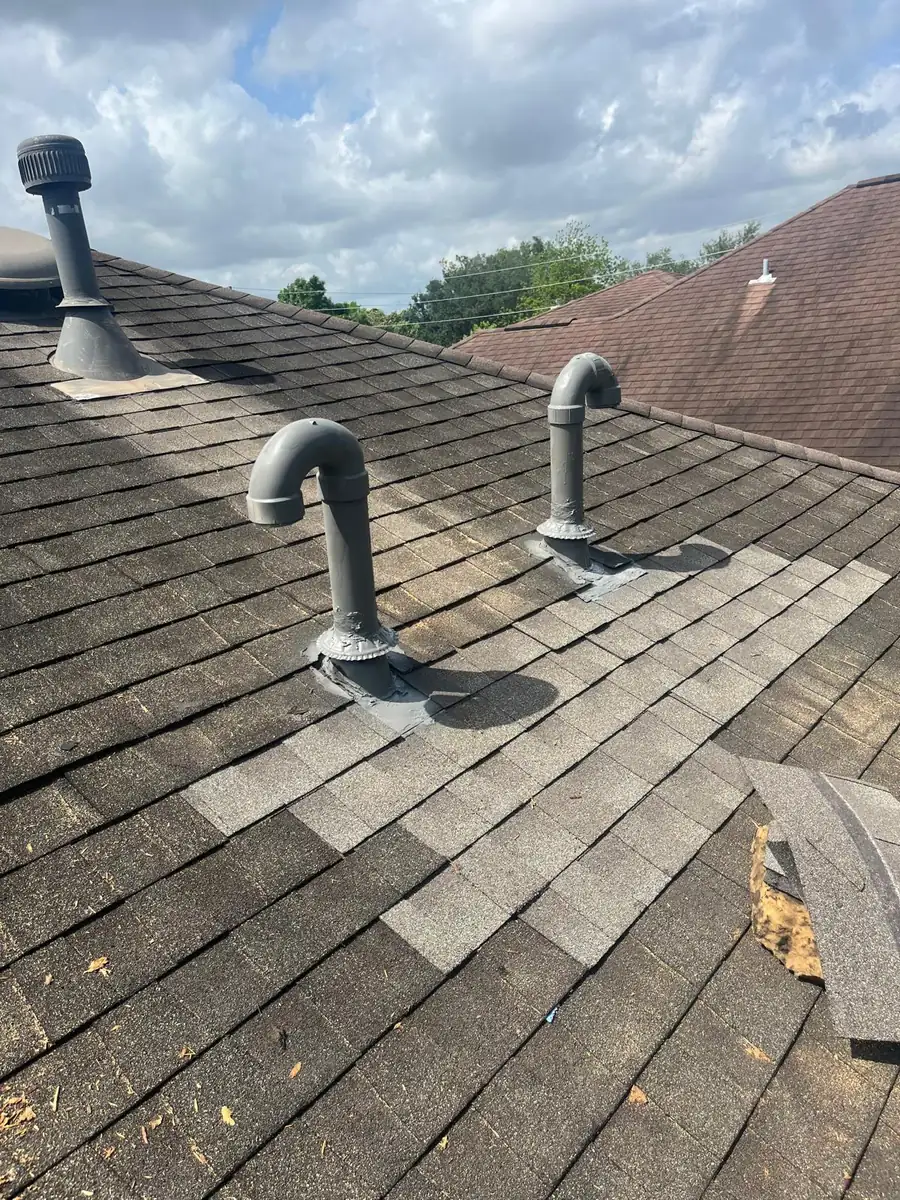
The final view in this photo set shows shingles around the pipe flashings. The repair is visible as part of the existing roof.
Questions to bring to your estimate.
- Is the damage limited to the flashing, or does the decking also need attention?
- How will the repair connect with the existing underlayment and shingles?
- What photos will document the area before it is covered?
Talk to a roofing contractor
A clear next step for your roof.
Tell us where the property is and what you’re seeing. We’ll discuss the roof concern, access, and the right next step for an inspection or estimate.
Call now: 832-996-0172Active leak or storm opening? Call to discuss current availability. Keep clear of wet roofing and electrical hazards.